The procedures below often link to content that elsewhere in Pliant's Online Help. This page serves as an overview for basic CrewWare startup. Since CrewWare operation differs per each customer's application, you may find that you need more information than what is provided here. A multitude of additional CrewWare resources are available throughout this site. We recommend using the site's Search function to find specific content to meet your needs. You may also contact our Technical Support representatives for help.
1. Install CrewWare on your PC.
How to Install CrewWare: CrewWare Tutorial Series - Part 1 from Pliant Technologies on Vimeo.
A copy of CrewWare is available from the USB drive included with your Control Unit or via Pliant's Downloads page.
The CrewWare installation file (“CrewWare_Setup.exe”) includes both CrewWare—the system management software—and CrewCom device firmware. To install or update CrewWare, right-click on the “CrewWare Setup.exe” file, then click Run As Administrator in the menu that displays. Follow the Windows installer instructions that appear in order to complete installation. When updating CrewWare, be sure to save a copy of your current configuration file before updating.
When using CrewWare with any kind of Windows application, be sure to make an exception for CrewWare in the Windows firewall and/or with your virus protection program.
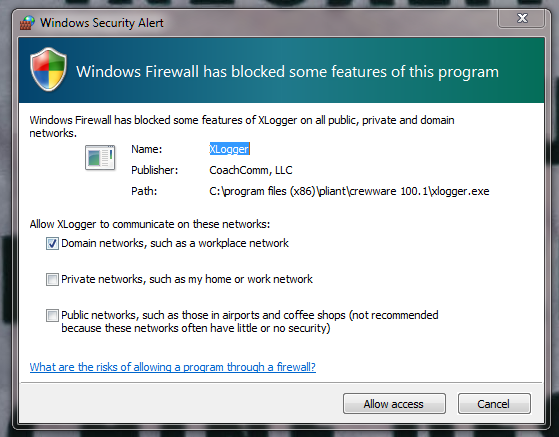
Note: One of the components of CrewWare, "Xlogger," is published by Pliant's parent company, CoachComm, LLC. Upon installation, it may cause a pop-up message similar to the one below. The Xlogger creates a proprietary log file for your instance of CrewWare, and will not perform any other action on the local system. It is safe to allow as an exception with your firewall and/or virus protection program. 
Instructions for updating device firmware are included in Update Firmware.
System Requirements
- Windows 7 SP1 or higher
- 4 GB system memory
- Intel Core2 Duo CPU @ 2.67 GHz or better
- 128-megabyte (MB) graphics card
- .NET version 4.5.2
Additional Recommendation
- XGA video screen; 1024 × 768 or greater resolution
2. Connect your hardware.
Add More CrewCom Devices
3. Configure your LAN and go "live."
Connect to CrewWare
4. Customize your CCF and upload it to your Control Unit.
Use the following pages to customize your CrewCom Configuration File (CCF) and customize your system via CrewWare.
- Build System Diagram
- Create Conferences
- Create Profiles
- Upload Configuration File (CCF)