Once the CU is powered on, and the configuration file is loaded, prepare your Radio Packs for operation by installing their batteries.
How To Install Batteries
- Hold the RP at about a 45-degree angle, pointing the bottom end down. Then, depress and hold the RP’s belt clip down.
- Lift open the battery door and remove it.
- While still holding the RP at an 45-degree angle and depressing the belt clip, install a fully-charged Pliant Lithium-Polymer rechargeable battery or three AA batteries.
- Place the battery door back on the RP, making sure to align and insert its tab, and then secure the door by pressing until it clicks. (Secure a magnetic door by pressing firmly until the magnet engages.)
- Turn on the RP by pressing and holding the Power button on the back for three seconds.
Important: The RP will not communicate unless it has been paired to a Control Unit; if it has not been paired it will indicate “No Pairing Information Available” on its display. In addition, the RP will not communicate if its CU and RTs are not yet online. Pliant recommends powering on CUs and RTs first before powering on RPs.
Note: Radio Packs (RP) are powered with one Lithium-Polymer rechargeable battery for more than 10 hours (2.4GHz) or 9 hours (900MHz), or they may be powered with three AA Alkaline batteries for approximately 5 hours (2.4GHz) or 4.5 hours (900MHz).
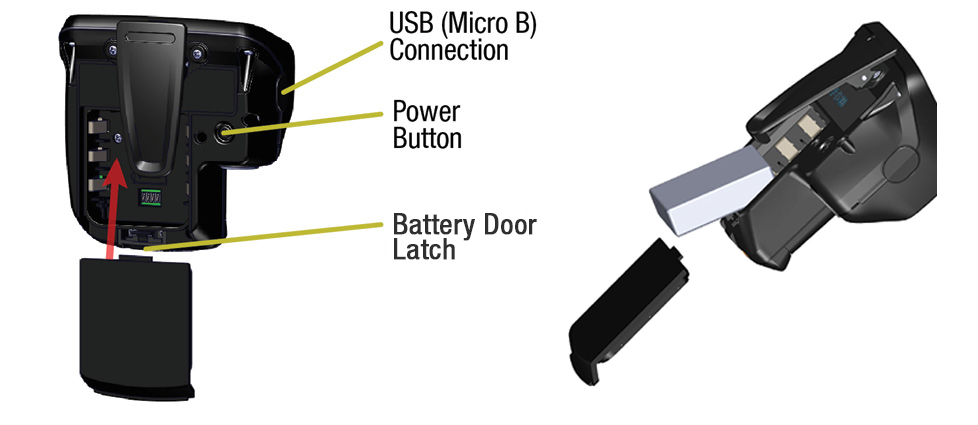
RP Rear and Battery Compartment Door
What's Next?
After you've installed Radio Pack batteries, you can move on to Pair Radio Packs.